CHAIN WAX – FASTER, BETTER, CHEAPER WAYS

If you wax your bike chain or have thought about starting, you aren’t part of some weird cycling cult with voodoo chain wax products and mysterious chain wax rituals.
Instead, you’ve found yet another way to ride faster and save money over the thousands of miles or kilometers you ride each year, something most cycling enthusiasts already want to do.
Of course, chain wax isn’t new. Cycling enthusiasts have been doing it for years. I’ve waxed my road and gravel bike chains since 2021.
In the last few seasons, however, chain wax products, processes, and knowledge have broken free from the Walter White, Breaking Bad type of homebrew, secretive chemistry. It can now be done far faster, with measurably better results, publicly available guidance, and at a quantifiably lower cost than oil lubes.
These improvements have made me and others rethink how we wax chains and what bike chain wax products we should use. I’ve concluded it’s time for more fellow enthusiasts to jump into the wax pot or, at least, put our chains in there.
That’s why I’ve written this review.
You’ve got three good ways to chain wax
With the recent advances in the world of chain wax, I now see three good options to up your game or get into it at the highest level. I call these the à la carte, platform, and concierge approaches.
Done right, each will deliver similar results that can make you a faster, more efficient rider, save you money on chains, cassettes, and chainring replacements, and keep your drivetrain cleaner than using an oil lube.
Here’s how I summarize each approach to chain wax.
À La Carte – doing all the steps yourself, including prepping, waxing, and maintaining your chain using the best combination of products and processes for your time, budget, and surfaces you ride.
Platform – using a single brand of chain prep and wax products and processes designed to work together.
Concierge – buying a chain that has already been prepped and waxed, leaving you only to maintain it.
Oil lubes are inexpensive to buy and easy to apply
Of course, these chain wax approaches should be compared to lubricating chains with oil or “wet lubes,” something most of us probably grew up doing.
Oil lube has historically been considered the easiest and least expensive way to get your chain to run fast. I was always told that all you need do is degrease a new chain, add a good oil lube, re-lube it when it gets dry or noisy, and clean and re-lube it when it gets really dirty.
You never need to remove your chain, the best degreasers and oil lubes cost less than $20 a bottle, and it takes less time to oil your chain and wipe off any extra than it does to top off your tire pressure.
What could be better, right?
In The Know Cycling is ad-free, subscription-free, and reader-supported. If you want to help keep it rolling without any added cost to you, buy your gear and kit after clicking the store links on the site. When you do, we may earn an affiliate commission that will help me cover the expenses to create and publish our independent, comprehensive, and comparative reviews. Thank you, Steve. Learn more.
Thanks to Performance Bike for providing me with Silca chain wax products for testing. The findings and recommendations that follow are independent of the product suppliers.
So why wax your chain?
If you’ve made it this far, I’m guessing most of you already know you can ride faster and save money while keeping your chain (and yourself) cleaner by lubricating with wax instead of oil.
But for those who want a high-level summary of why and to see it quantified by watts and cost savings, let me give you that.
Independent testing has shown that a waxed chain goes through your drivetrain with less friction than one lubricated with oil. That enables you to ride more efficiently, either faster than you would for a given amount of power or putting out less power to keep the same speed.
A waxed chain also repels contaminants like dust, grit, dirt, sand, or water, while an oiled chain collects it riding on and off-road.
All of those contaminants add friction and resistance to an oiled chain. That makes it progressively less efficient than a waxed chain the more you ride.
About 10 years ago, the independent lab Friction Facts (later acquired by Ceramic Speed) compared the efficiency of 55 bike lubricants for Velo News. The test showed that at 250 watts on clean chains, paraffin or candle wax, the most basic of waxes, was marginally faster (0.24 watts) than the fastest oil lube, one with Teflon additives.
After both chains were exposed to dirt, sand, and water, the paraffin wax was about 2.5 watts faster than the best oil lube. Compared to lesser oil lubes, the efficiency gap to paraffin was notably wider.
Since then, many chain waxes have been introduced with wax blends and additives to reduce friction beyond the performance of paraffin wax. New oil drip lubes are also now available, but the efficiency gap remains.
Frankly, if all that chain wax had going for it was saving 2-3 watts, I’d still be lubing my chain with oil.
Instead, reducing the wear on my chain, cassette, and chainrings and cutting way back on how often I needed to replace those costly parts is an even bigger reason to switch to chain wax.
And the way that platform or concierge waxing has made everything quicker and easier than an improved à la carte approach has made chain wax an even better choice than oil lube.
Waxed chains and the cassette sprockets, chainrings, and pulley wheels they constantly roll over are also much cleaner than oil-lubed ones. They look better on your bike and make handling wheels and tires, something we all need to do occasionally when we flat out on the road or put on a new set of tires or wheels, much cleaner.
The focus is now on measuring wear and cost benefits
Chain lube testing now compares how well different oil and wax lubes protect chains from wear in a combination of dry and contaminated surface conditions. From the results, they estimate how long your drivetrain components – your chain, cassette, and chainrings – will last and the cost to replace them for the distance you ride.
Zero Friction Cycling, or ZFC, has become the most respected independent tester of a lubricant’s effect on chain wear and the lubricant and drivetrain costs of using oil and waxed lube caused by that wear.
While done exclusively in a laboratory, their testing simulates the effect of chains ridden over clean, dirty, and wet surfaces that we experience in the real world.
ZFC contends that enough testing and logic support a strong correlation between chain wear and efficiency. Specifically, the better the lubrication reduces friction, the slower the chain will wear, and the more efficient or faster you will ride on your bike.
If you care about the cost of maintaining your bike as much or more than how fast you ride, ZFC’s test results show that using chain wax instead of oil lube can save you hundreds of dollars a season. That’s because waxed lubricants extend the life of your chain, cassette, and chainrings far longer than you’ll get using oil-lubed chains.
With the Omni Calculator Bicycle Lubricant Cost-to-Run Calculator, which uses the chain wear data from ZFC, you can calculate the cost of lube and wear on your drivetrain components. You can specify the lube products you’re interested in, the surface conditions you ride, your annual riding distance, and your groupset level.
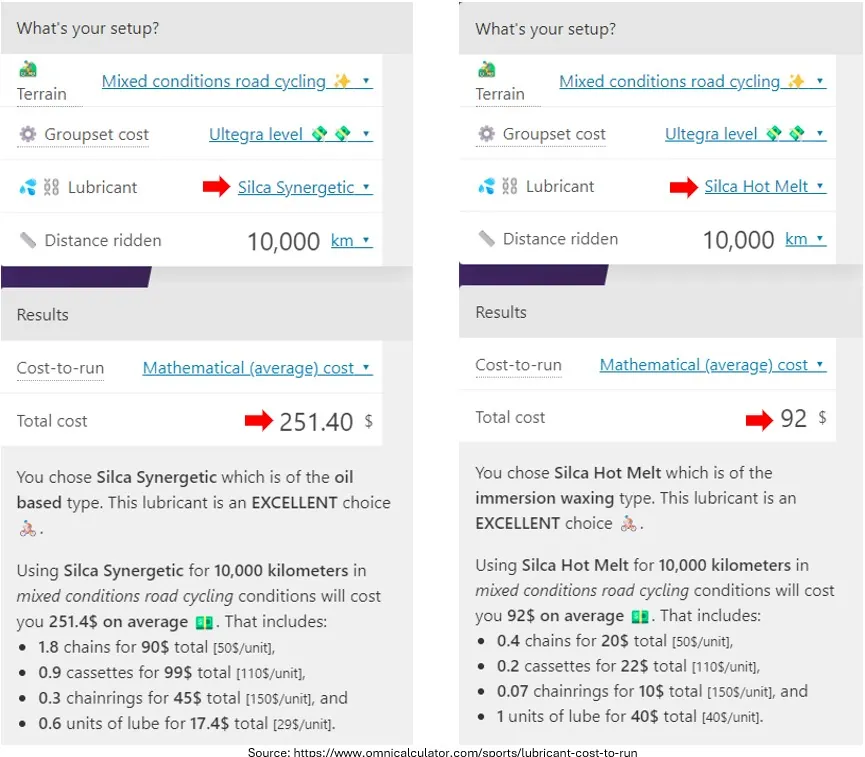
For example, doing a season’s worth of road riding or 10,000 km or 6,200 miles using one of the better-wearing oil lubes like a US$25 bottle of Silca Synergetic or Rex Black Diamond on a Tier 2 Ultegra groupset will cost you about $250 for the lube and cost of the drivetrain component wear.
Doing the same with one of the top immersive wax lubes, like a US$40, 500-gram bag of Silca Hot Melt or mSpeedWax will cost about $90.
Again, that’s for the lube and cost of the wear on the chains, cassettes, and chainrings.
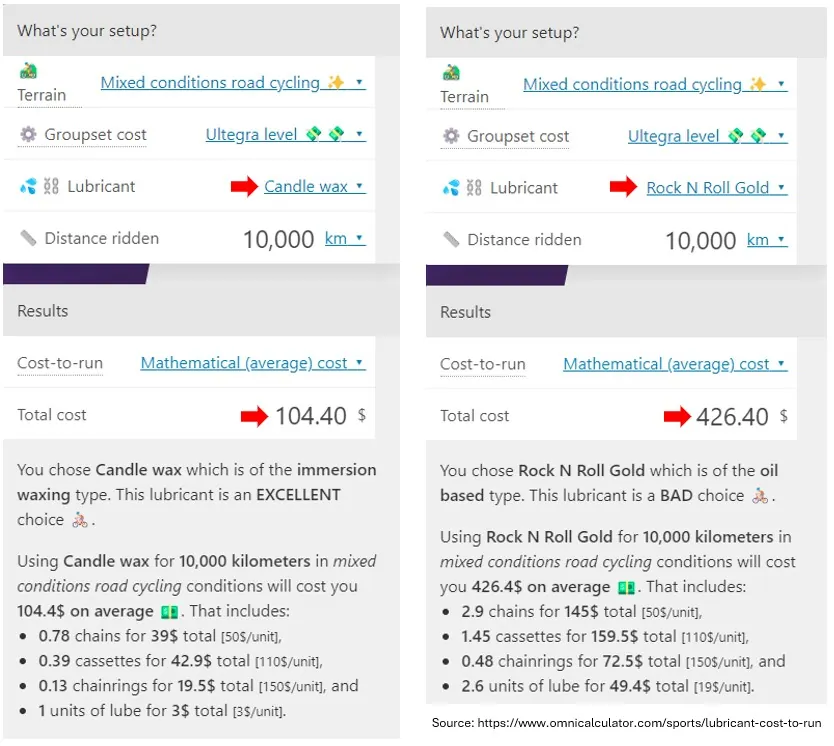
Using paraffin or candle wax like Gulf Wax, that costs about US$10 less for the same amount of wax but wears more quickly than one of the better-performing waxes, will cost you about US$105 or about $15 more than more expensive waxes that wear longer.
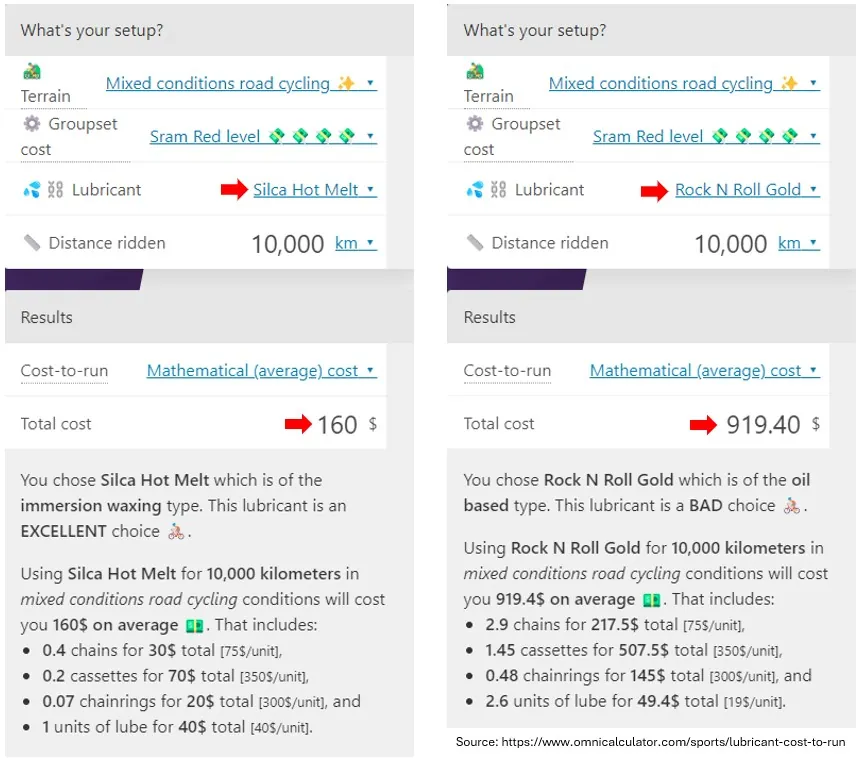
A popular US$8, 4oz bottle of oil lube like Rock N Roll Gold or US$12 bottle of Boeshield T9 will cost about $400 when you include the drivetrain wear costs.
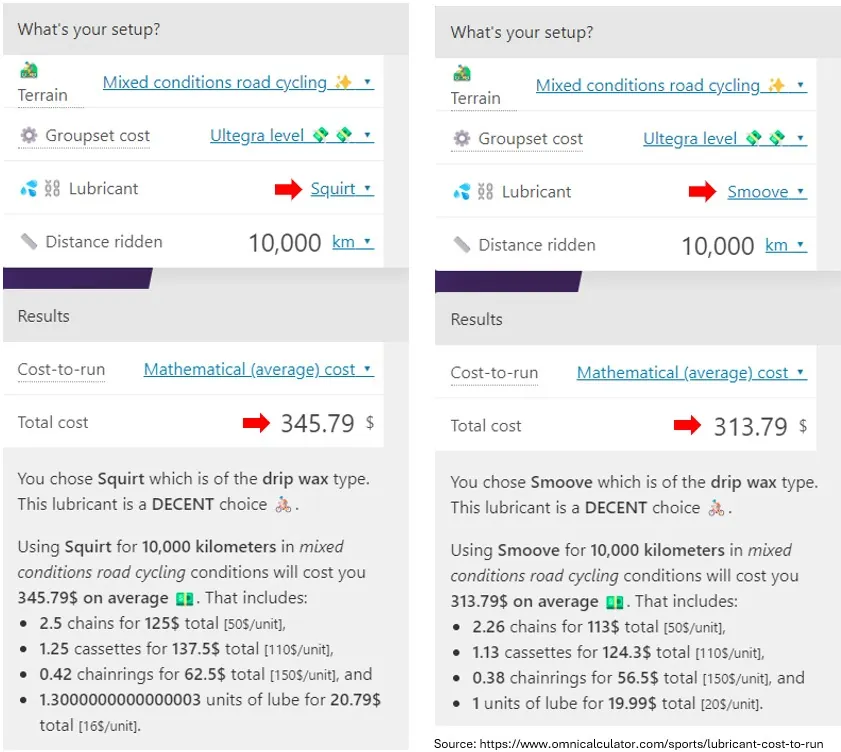
Want to use drip wax like Squirt (US$15 for a 4oz bottle) or Smoove that’s easier to apply than an immersive wax like Silca Hot Melt or mSpeedWax? It will still cost you over $300 for that season of road riding on Ultegra components, more than the best oil lubes.
Why? Drip waxes don’t penetrate the chain as effectively or last as long as the better immersive waxes or oil lubes and cause the chain, cassette, and chainrings to wear more quickly.
The cost differences between immersively waxed, drip waxed, and wet or oil-lubed chains are even greater with first-tier groupsets like Shimano Dura-Ace and SRAM Red because replacing the drive train components costs much more.
Likewise, if you periodically ride or commute on wet surfaces or off-road even with the same level groupset, for example, a Shimano GRX, the costs will be much higher than on the regular mixed conditions road surface examples I shared above.
The irony is that the least expensive or easiest to apply lubes – usually oil-based ones – end up being the most expensive to use.
The key point is that a properly waxed chain greatly reduces the friction and wear on drivetrain components, increasing your efficiency or speed when riding them and reducing your costs to maintain them.
Oiled chains do the opposite – more friction, more wear, higher drivetrain costs, more power required to maintain the same speed, and a dirty chain and messy degreasing process.
Keep your drivetrain and yourself clean
A waxed chain maintains its efficiency for 300 to 350km or about 200 miles, repelling the dirt, dust, grit, sand, and water that builds up on an oil-lubed chain like a grinding paste.
How often you degrease an oiled chain depends on how much you dislike the process and the time it takes versus how dedicated you are to maintaining a clean, more efficient, and less costly drive chain.
Because I’m always swapping wheels for testing, having a perpetually clean chain and clean hands when I’m handling the chain, derailleur, and cassette initially drove me to chain wax. The efficiency gains and cost benefits are big plusses, but I’d probably still wax just to keep my chains clean even if I didn’t get the other benefits.
How to compare and choose chain wax approaches
With that comparison of wax vs oil lubrication out of the way, let’s compare the à la carte, platform, and concierge chain wax alternatives.
The best way to compare them is to look at how you prepare a chain, wax it, and maintain it.
That will tell you which best suits your available time, budget, and space.
Chain prep is, or was, a big hurdle to becoming a chain waxer
Chain prep is a simple-sounding phrase for completely removing all the oil and grease that’s applied to a new chain at the factory, which keeps it from rusting until you own it as part of a new bike or replacement chain.
Cleaning all the plates, rollers, and pins of your chain of all chemicals and residue is essential to get wax to adhere to your chain. It’s not a simple matter and needs to go well beyond what you can do with a good degreaser.
If you’re new to chain waxing, plan on starting with a new chain. You can’t remove enough contamination from a used chain even with a crapton more effort and solvents than you would use on a new one to get wax to adhere adequately and extend the chain life.
À La Carte chain prep
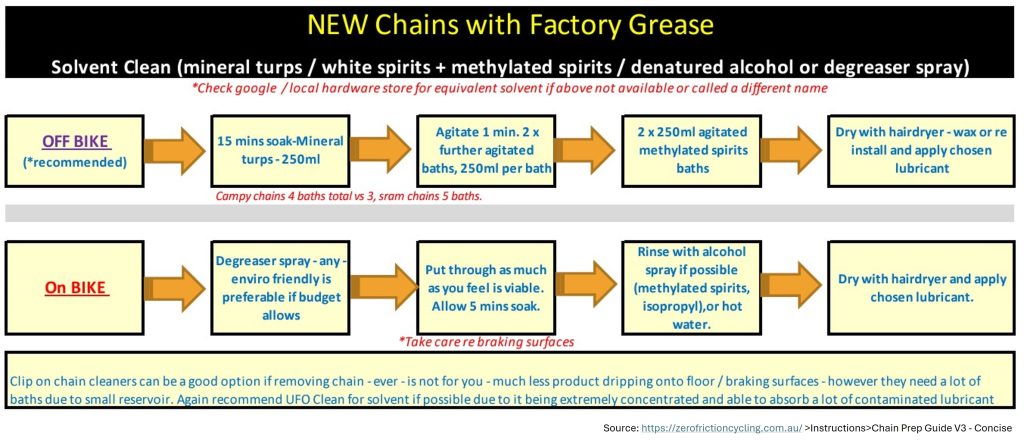
With the original à la carte approach, one I’ve followed from when I first started waxing chains until recently, you put your chain in a ball jar and let it soak for 15 minutes in mineral spirits or a similarly named solvent that you can get at most hardware stores (US$20 for 1 gallon or 3800 ml can). Then shake it for a minute and repeat the shaking process with fresh mineral spirits another 2, 3, or 4 times, depending on whether you have a Shimano, Campagnolo, or SRAM chain, respectively.
Then, you do two more rounds of agitation with denatured alcohol (US$30 for 1 gallon or 3800 ml can) to remove any remaining film and hang it to dry for several hours, or use a hair dryer or air compressor before you wax it.
You can see a video of how it’s done here or follow the process outlined by ZFC below. I don’t recommend doing it on the bike – very messy, hard to protect bike paint and brake surfaces, and you don’t get your chain as thoroughly clean as doing it off the bike.
To prep a chain this way, I’ll typically spend about 30 minutes between setting up, soaking, shaking, drying, and cleaning up.
Even if you filter and recycle the solvents you use to prep a new chain, which adds time to the process, you must dispose of them properly at some point. That might be possible only once or twice a year at your local hazardous waste disposal facility. Some places don’t allow for solvent disposal.
More recently, cleaning solutions like Silca Ultimate Chain Stripper (US$36 for 16 fl oz, 475 ml bottle) and Ceramic Speed UFO Drivetrain Cleaner (US$27 for 500 ml bottle) have been introduced to strip the grease and oil off a new chain to prepare it for waxing.
You do it with one soak-and-shake step for the Silca stripper and a spray-on-and-wait step for the UFO cleaner, followed by a couple of water washes. It takes about 15 minutes to do these, with similar disposal considerations.
That’s a more refined, somewhat faster, and more expensive approach that requires similar workspace and containers.
Platform chain prep
Silca has introduced a way to eliminate the need to clean your chain before waxing it. No solvents, containers, soaking, shaking, cleanup, or disposal.
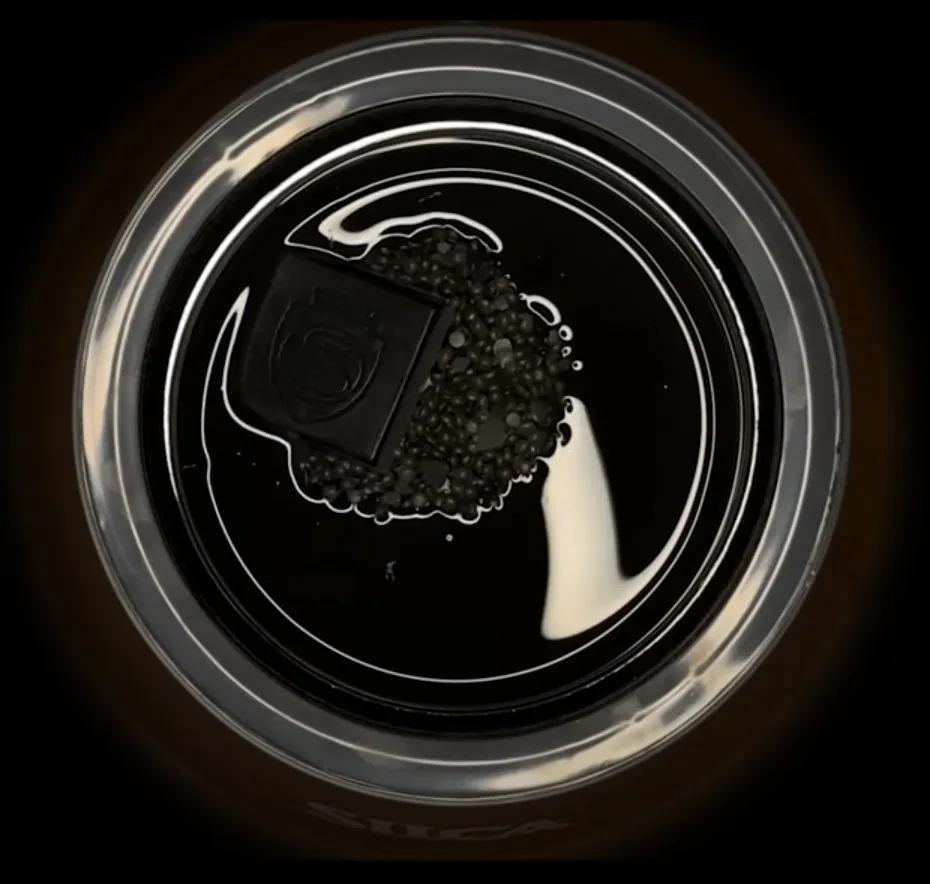
It’s called a Strip Chip (US$24 for six chips), a thin square concoction that melts in its Silca Hot Melt wax. It converts the chain grease and oil into wax-like molecules as part of the immersive waxing process.
You first heat the hot wax to a high temperature (125C), then melt it in the Strip Chip. You then put your chain in the mixture for a specified period of time to allow the conversion to be completed.
Then, you drop the temperature to a level more typical for immersion chain waxing (75-90C), leave it there for another time period, and then remove the chain. After it cools, put the chain on your bike and you’re ready to roll.
You can also get Silca’s purpose-built hot pot or the Silca Wax Melting System ($99), whose size, temperature range, and temperature controls are designed for its chain waxing system.
The process takes about an hour, including the time to melt the wax initially, getting your chain up to temp before the process begins, the chain cleaning and waxing process time, and how long it takes for your chain to cool after you take it out.
Silca provides enough chips in one relatively inexpensive package to put 6 new chains through this process.
The approach is smart, and their how-to and Q&A videos are helpful even if you have to overcome the somewhat smug, aw-shucks delivery of Silca’s owner.
The company has essentially created a chain wax platform that you never have to stray from. They’ve combined the chain prep, immersive wax, and hot pot designed to work together in a relatively simple, fast way that takes up very little space.
Silca extends the platform with its Super Secret drip wax that shares the same wax base additives as its hot melt immersive wax. You can use it to top off your chain with wax for a few rides when the chain starts to get loud, but you don’t have another waxed chain to swap it out with or time to re-wax it in your hot pot.
It’s an end-to-end combination of integrated products from one supplier, such as the Apple iOS or YouTube platforms or, dare I say, Specialized’s cycling platform of bikes, components, and apparel.
You can use another hot pot with Silca’s Strip Chip and hot wax. You can also use other hot waxes like the similarly high-performing MSpeedWax with the Strip Chip.
But you can get everything you need from Silca, which has integrated product pieces and gives you better control of the chain cleaning and waxing process in their hot pot to make it better, easier, quicker, and potentially less costly than a à la carte approach.
It sells this platform of products in a chain wax bundle (US188).
The cost of going with the Silca platform isn’t that much more if you have been waxing for a while and have gotten your money out of your crock pot or prefer to do something else with the time and effort it takes to prep a new chain.
Concierge chain prep
Finally, with a concierge approach, you don’t have to clean or even wax a new chain. That’s because you order a chain from your concierge … uh chain supplier … that’s already been cleaned and waxed. You just install it on your bike, and off you go.
A pre-waxed chain costs twice what the same unwaxed chain does with all the regular packing grease and oil. But, of course, you don’t need to spend the time, money, or effort to prep and initially wax it.
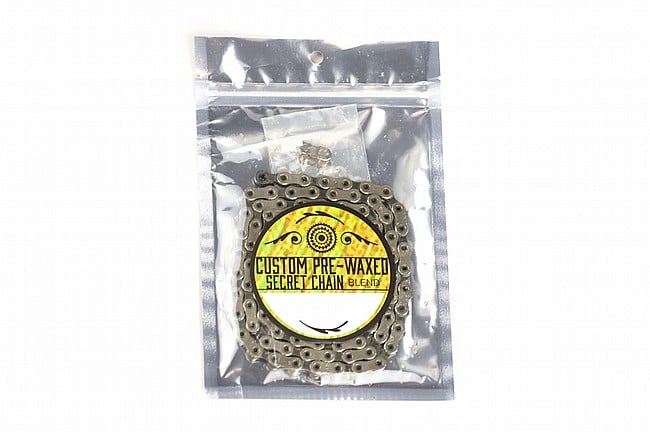
Is that worth the extra $50-75? That’s your decision, but at least it’s an option.
You still need to do regular wax treatments to maintain the wear and efficiency of your new chain. However, riding on a waxed chain for the first time without buying chain wax products and going through the prepping and initial wax steps might help you decide whether to convert to waxing full-time.
If you decide you don’t want to continue waxing it, just use an oil lube once the wax wears off.
There isn’t a big market for pre-waxed chains. Silca and some of its retailers sell Sram Red, Force, and Eagle chains, as well as Shimano Dura-Ace ones. Cyclowax in Belgium sells many of those models treated with its own wax along with selected Campagnolo Super Record and Ekar chains,
Ceramic Speed sells its own chains for SRAM and Shimano groupsets pre-waxed with its UFO drip lube. Along with its chain cleaner and drip waxes, that’s another type of platform play.
If you’ve already decided to adopt hot waxing, Cyclowax has a concierge-platform combo approach to get you jumpstarted.
It sells a Clean Chain Starter Kit for US$220 that includes a pre-waxed 13, 12, 11, or 10-speed Shimano, SRAM, or Campy chain, its own Cylcowax, and a Cyclowax hot pot that preceded and looks very much like the inspiration for Silca’s hot pot (though with a fixed 95C temp setting good for waxing but not high enough for a Strip Chip).
ZFC hasn’t completed its testing of Cyclowax’s hot wax, but results from its first two testing blocks were competitive with the leading waxes from others.
Birds of a feather – immersive and drip wax – don’t flock together
You’ll get the longest and least costly chain and drivetrain wear by regularly doing immersive hot waxes rather than using drip wax alone or combining the two.
While drip wax is easier and takes less time than immersive wax, some don’t penetrate as thoroughly. They also don’t last as long but can extend the time between immersive wax treatments for a few rides.
Drip waxes can also be messy to apply and should be left to dry overnight or, ideally, for 24 hours to allow the liquid carrier used to apply them to fully evaporate and the wax to set.
ZFC’s chain wear and cost-to-run data is clear. The top immersive hot waxes, including Silca Hot Melt, MspeedWax, Rex Black Diamond, and even paraffin wax, rate higher and will cost you less in the long run than using the best drip waxes like Silca Super Secret (US$25 for a 4oz or 120ml bottle) and Ceramic Speed UFO (US$24 for a 100ml bottle).
As I detailed earlier, popular drip waxes like Smoove and Squirt are some of the worst-performing chain lubricants, wearing and costing more than the best oil lubes.
Choose a top immersive chain wax
If you take an à la carte wax approach, you can’t go wrong with Silca, MspeedWax, or Rex Black Diamond immersive hot waxes. Their chain wear performance and cost-to-run numbers – about US$90 for 10,000 km with an Ultegra level chain on mixed road conditions – are the best.
A container of each of these waxes is about 500g or 1.1 lbs, costs between US$40-60, and will last for about 30 waxes, depending on how frequently you need to wax. If you ride 10,000 km or 6,000 miles a year, that should cover you for the season.
A $35 to $50 crock pot or general-purpose slow food cooker will typically cost 1/3 to 1/2 the price of the Silca or Cyclowax pots designed for chain wax. However, crock pots at that price lack digital temperature control and are 5x the volume of chain wax pots. That’s less precision and more energy (and time) to warm up your wax.
A crock pot and separate digital thermometer worked for me during my à la carte wax chain wax days, but I still needed to monitor the temperature for waxing, typically after setting my pot to the low setting.
Instead, I’ve found the designed-for-purpose Silca pot, its size, built-in digital temperature control, chain hanger and stand, and smaller footprint a much better – easier, quicker, more confident – waxing solution.
Get a rhythm going to maintain your chains
If you are serious about your cycling, you know the value of training with a plan and riding consistently.
The same approach applies to maintaining your bike, including chain waxing. A good wax will last about 300-350 km or 200 miles on relatively clean and dry roads. Figure out how often you ride that distance – every 5, 7, or 10 days – and plan to put on a freshly waxed chain at that interval.
For me, that’s often the same interval at which I’ll recharge my head unit and lights. While I’ll typically do my electronics and chain “maintenance” on a Monday or Friday rest day, a chain that needs waxing before then will let you know it’s time by running louder than usual.
So what happens when I know my chain needs more wax and I don’t have the time (or desire) to pull out my wax pot and rewax it? What about when I do a road ride on a wet day or ride gravel in the spring when it’s muddy and need a freshly waxed chain for the next ride?
Quite simply, I’ll wipe the chain off with a microfiber cloth if it’s dusty, flush it with hot water if it’s dirty, set it aside, and replace it with another chain I’ve already waxed that is ready to go. It takes 5 minutes.
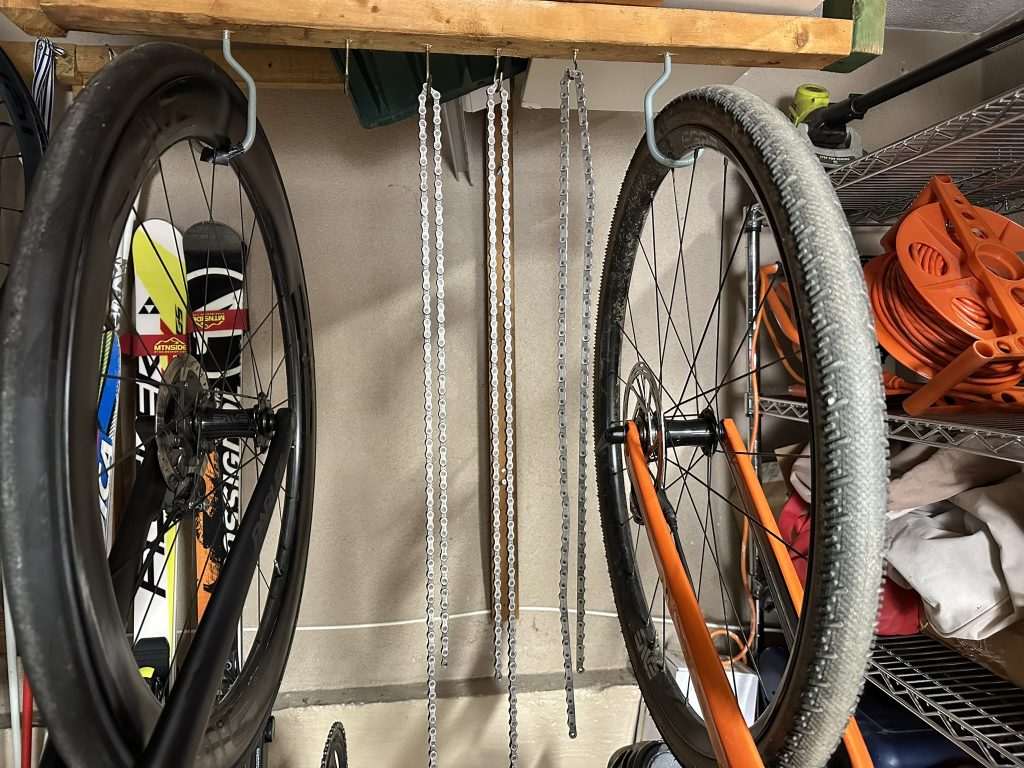
I rotate through 3 road chains and 2 gravel chains. Once a month, I’ll hot wax all the chains on a rest day. When my wax pot is hot, it’s efficient to do all of them in succession, taking about 10 minutes a chain. There’s very little lost time, as I’ll be doing something else at the same time in my workshop.
Sure, it’s an investment in a few additional chains. But I haven’t had to replace one in three years, and with none showing any stretch, I probably won’t for another couple.
Keep it simple
The best hot waxes made by different brands use unique additive combinations and concentrations in a refined paraffin wax base containing little oil. Drip waxes also contain carriers that make the application possible without heat and evaporate as part of the drying process.
If you follow an à la carte approach, you could, for example, use a Silca Strip Chip with mSpeedWax hot wax and Ceramic Speed UFO drip wax. There’s nothing about their formulations or application processes I’m aware of that wouldn’t cause them or similar combinations to work together.
However, a platform approach using a line of products from the same company will give you a consistent additive combination and concentration. This should provide more predictability around how long your wax treatment will last.
While not essential, buying a concierge pre-waxed chain with the wax you intend to use regularly will provide continuity.
Pro tips this amateur learned along the way
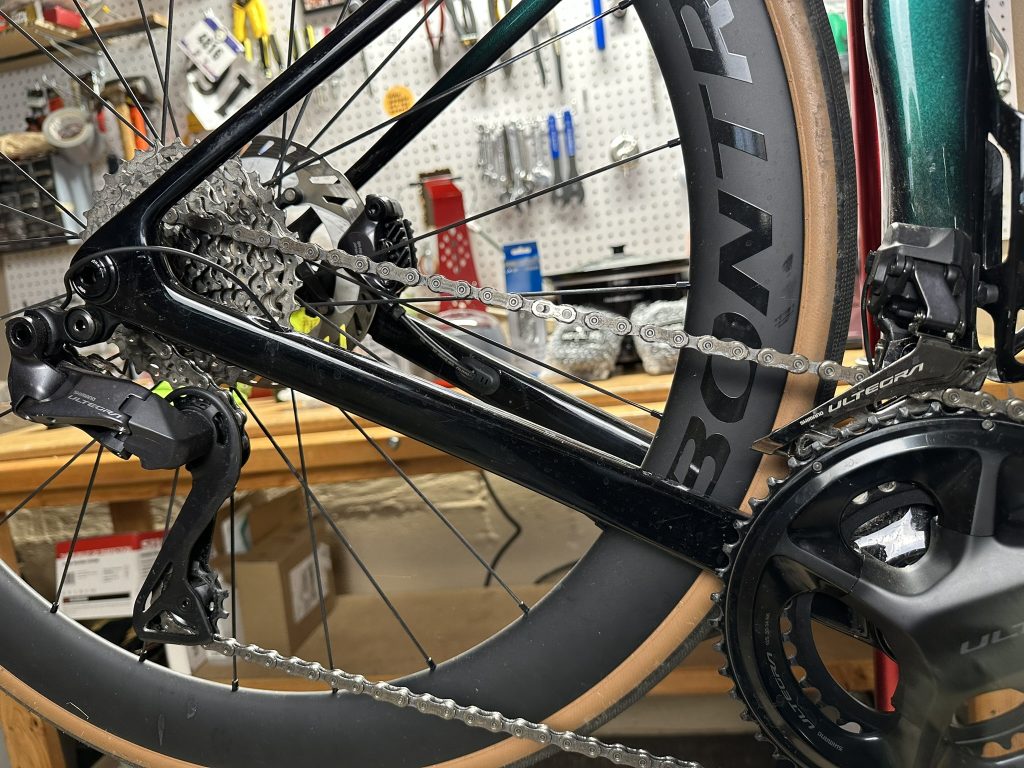
If you’re going to be a good chain waxer, it’s best to do your chain prep, initial waxing, and wax maintenance or rewaxing with the chain off the bike.
Removing and replacing a chain can be – like anything else you may have never done as an amateur bike wrench – a bit confusing and easy to get wrong. Here are a few things I learned along the way.
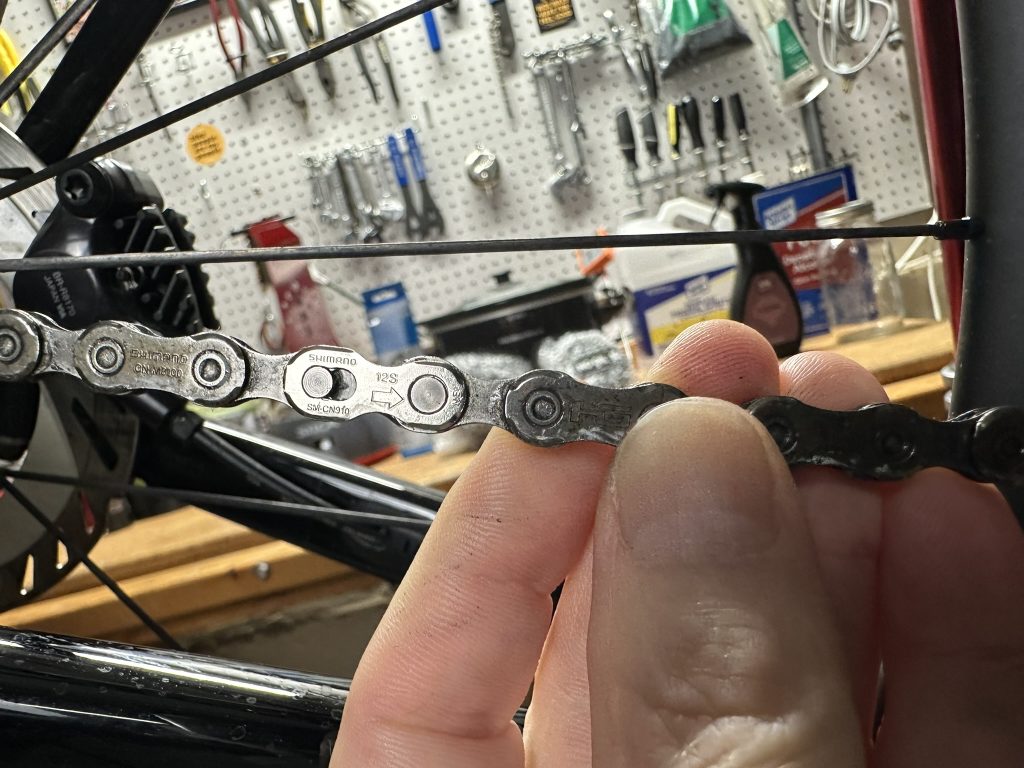
* Use a tool that can both open and lock your quick link, like this Shimano TL-CN10.
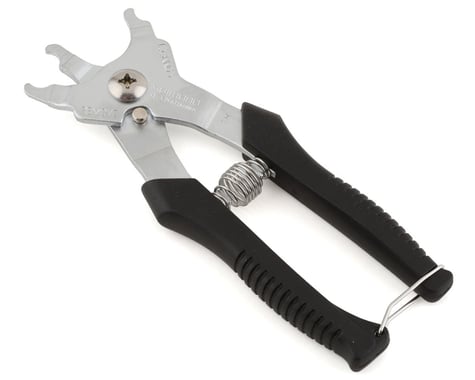
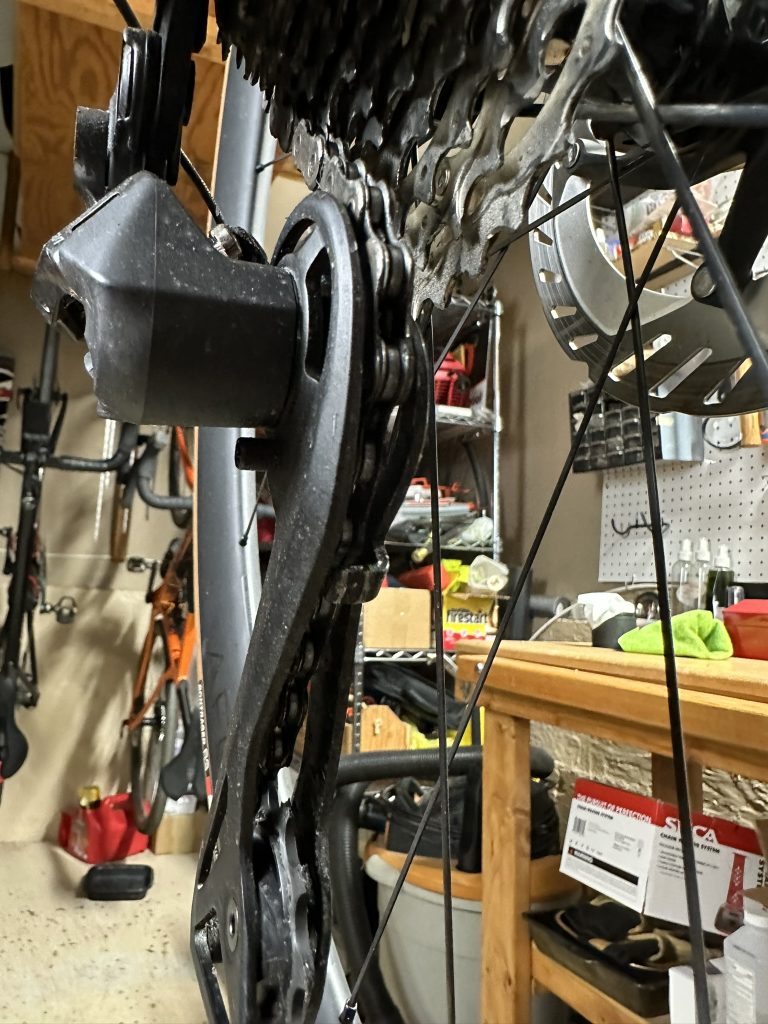
* Thread your chain above the rear derailleur tab between the pulley wheels.
* Run the chain with the markings on the chains facing out.
* Align the quick link arrow with the direction the chain will go when you’re pedaling.
Choose the approach that’s best for your situation
The early days of chain waxing were filled with uncertainty about the best products and approaches and how much benefit you got from lubricating with wax vs. oil.
Chain wax practice is clearer now, as are the efficiency, cost, and cleanliness benefits. Having three alternative approaches makes it possible to choose the best one for each of us.
The à la carte approach gives enthusiasts the most choice but requires the knowledge to mix and match, the discipline to price shop, and the most space and time. If you ride a lot and have a lot of bikes, it’s probably well-suited to your style.
A platform approach is relatively simpler and requires less space, though it will probably cost you slightly more to get set up.
If you’re new to chain wax or have little time or desire to prep each new chain, follow the concierge approach by starting with pre-waxed ones. The out-of-pocket costs will be more than the other two approaches, but you’ll get out on the road sooner and spend less time in your workshop.
The difference between these three is much less than the efficiency, cost, and cleanliness differences between any of them and oil lubrication. Pick one that works best for your situation.
As I work through the cleaners and waxes (and dispose of the solvents) I’ve accumulated using an à la carte approach, I’m moving toward a platform one. If I were starting again, I’d likely jump in there, but I know that some enthusiasts I ride with will be most comfortable trying it out with a concierge chain.
I’d be curious to read about your experience and preferred route in the comments below.
Links to products mentioned in this review
Chain prep
Oil lube
Chain wax
Pre-waxed chains
- Sram Red, Force, and Eagle, Shimano Dura-Ace brand chains pre-waxed with Silca Hot Melt
- Ceramic Speed brand SRAM and Shimano chains pre-waxed with UFO wax lube
- SRAM, Shimano, and Campagnolo brand chains pre-waxed with Cyclowax
Chain wax bundles
* * * * *
Thank you for reading. Please let me know what you think of anything I’ve written or ask any questions you might have in the comment section below.
If you’ve benefited from this review and want to keep new ones coming, buy your gear and kit after clicking the store links in this review and others across the site. When you do, we may earn an affiliate commission that will help me cover the expenses to create and publish more ad-free, subscription-free, and reader-supported reviews that are independent, comprehensive, and comparative.
If you prefer to buy at other stores, you can still support the site by contributing here or by buying anything through these links to eBay and Amazon.
You can use the popup form or the one at the bottom of the sidebar to get notified when new posts come out. To see what gear and kit we’re testing or have just reviewed, follow us by clicking on the icons below.
Thanks, and enjoy your rides safely! Cheers, Steve


Great article. Thank you. One question, how often do you change the quick link?
Dan, Thanks. I use a new quick link every 3 or 4 chains. When the link doesn’t snap in as firmly as it used to, it’s time to make a change. I also carry an extra link in my saddle bag in case I need it out on the road. Steve
I’ve been using the same Wipperman Connex 11-speed link for years. I keep a spare Shimano Quick link in the bag.
One question on the Silca Strip Chip: so if you have, as I do, the Silca pot and fill it with the correct amount of wax and then put a strip chip in it and do a new chain, what then? Can you use the remaining wax in the pot for a second new chain – or do you need to add a further Strip Chip? Effectively the pot is now contaminated by the strip chip and factory grease but is solid in the pot. And if you put in the amount of wax recommended by Silca, that’s rather a lot of waste if it not reused.
Also with Silca launching the speed and endurance chips, how are these meant to be used if the pot has had a Strip Chip in it? What was quite a simple process has become a bit complex.
Jon, You want to add a strip chip into the pot before you add each new chain to be stripped. The chip has wax similar to what’s in the Silca hot melt and surfactants that remove and encapsulate the grease and oils on the chain. You don’t contaminate the pot. Silca says you can use 6 chips or strip 6 new chains per pot of wax filled with a bag or 500g/1.1. lb of wax. Unless you’re buying a lot of new chains and stripping them at once, I don’t think it’s very likely you would use that many chips. ZFC has suggested using 2 or 3 chips per pot to avoid affecting the concentration of the wax and surfactant. Steve
Hi. Great article. From my perspective nothing has made my Campy drive train shift faster than REX BLACK DIAMOND. I applied this to a previously waxed chain and actually had to reset the shifting! The readjustment was due to over shifting. Amazing difference.
None of these guides address the dark little secret about chain waxing: whether to re-use the quick link. The manufacturers all say “single use only” and at $15-20 each (if you can find them–who has Shimano 12 speed?) the cost alone changes the calculus of regular waxing.
One hears reports of reusing quick links but not how often or how to judge when they are really worn out. Having a quick link fail when you’re putting out 400 watts will not end well.
I’d like to hear how well waxing works for rain. White Lightning is good for one ride in the rain. No way I’m going to hot wax for one ride.
Nothing dark or secretive about quick links. You can find them at stores like Performance Bike (see here) or Amazon. They cost from $5-8 for a Shimano or SRAM link if you buy them 2 to 4 per package, less if you buy KMC links which work equally well in my experience. You can get as many as 5 uses out of them but I stick to 3 or 4. So about $1.50-$2.50 per use. When they don’t snap into place, you know it’s time to switch.
Waxed chains wear better than oil-lubed ones in wet weather and attract less contaminants. You’re going to want to clean and re-lube either after riding in the rain.
Looks like there is a lot of variability in quick link prices. REI is $14 for one 12 speed XTR link; Competitive Cyclist is $15.29 for two 11 speed Shimano links.
Great article! As a newby to chain waxing your article covers the key topics. About 3 months ago I purchased Silca Chain Wax system which I share with my riding buddies. Having never removed a chain until I bought the system, I’m now a regular user of it. It’s so easy!!
I’ve been chain waxing for about a year on my road, gravel and MTB bikes. Overall, it has delivered on the promises of a clean drive chain and easier maintenance. I bought into the Silca complete system and that makes it faster, easier and more convenient to re-wax.
Yes, you do need to clean and re-wax the chain after a rainy ride. But that’s as easy as removing the chain, stick it in boiling water for a few minutes and all the dirt comes off with the wax, then wipe it down and drop it in the Silca waxer. It’s actually much faster than getting all the muck off an oily chain and bike because with waxing the muck doesn’t stick to…everything like glue. The whole bike washes off so easily without the sticky, gunky mess and without all the brushes and elbow grease.
There are a few gotchas — the factory grease on SRAM chains does not want to come off. I use the Silca chain stripper solution (not the chip) and I have to run the chain through it two or three times before there is no visible grease when I wipe the chain down with a cloth. The other gotcha is noise — SRAM chains get noisy pretty fast with waxing, as in only a few rides before the noise is annoying to me. Silca says the internals of the chain still has wax, but SRAM chains just run noisy because the wax flakes off the outside surfaces of the chain. But I just bought the Endurance chip and now the chain stays quiet for noticeably longer.
Speaking of flaking wax, when you put a freshly-waxed chain on there will be wax flakes coming off. Waxed chains take a few miles for the chain to run smooth and they don’t run well for those few miles. But it’s only like 2-3 miles in my experience. Then it’s smooth, quiet, and buttery.
Last but not least, I wish there was a robust, re-usable quick link for SRAM chains which was stress-tested for at least ten re-uses. There is not. So waxed chains aren’t hassle-free. But they are less hassle and work better than any kind of oil I’ve ever used.
“There are a few gotchas — the factory grease on SRAM chains does not want to come off. I use the Silca chain stripper solution (not the chip) and I have to run the chain through it two or three times before there is no visible grease when I wipe the chain down with a cloth. The other gotcha is noise — SRAM chains get noisy pretty fast with waxing, as in only a few rides before the noise is annoying to me. Silca says the internals of the chain still has wax, but SRAM chains just run noisy because the wax flakes off the outside surfaces of the chain. But I just bought the Endurance chip and now the chain stays quiet for noticeably longer.”
Thank you for this tip!!!
SRAM flattop chains suck for waxing and nobody is talking about it. SRAM needs to make a wax-friendly chain finish. I’m very curious how the Jumbo L-A-B and Silca partnership will work if they are waxing the chain of every bike every day … because they start to get noisy after 100km. I will try the endurance chip. If that fails, I think I’m going to alternate between a waxed chain and a chain lubed with Synergetic.
… now Silca has posted a video about adding Synergetic to the hot wax.
I have tried this … my wax pot has 1 Endurance chip and ~1/3 bottle of Synergetic (the e-bike one).
The Endurance chip made a noticeable improvement in the number of kilometers before the chain got noisy – going from ~200km to ~400km. Adding the Synergetic seems to smooth the chain even further … still early days on this … I will try to update later. I’m also hoping this improves the corrosion resistance on my commuter bike – I live where the roads and bike paths are salted and the chain takes a beating. Just wax does not protect the chain, so hopefully adding Synergetic helps. (FYI – for a commuter bike, the cleaning before waxing is quite time intensive).
I also have a bike using the SRAM flattop rainbow chain which did not work at all with wax – becomes noisy after 50km. I switched to using Synergetic and it’s very good, very smooth and relatively quiet. I just don’t like the mess when doing other bike maintenance (as explained by Steve). I’m very curious to see if this chain works with the wax + Endurance chip + Synergetic.
I’ve been wanting to start waxing my chains but didn’t want to make the leap until I read this, thanks again for such a thorough review. Simply having a cleaner bike is probably reason enough to switch but the overall cost saving potential makes me wonder why I haven’t started sooner. I’ve been using Silca Synergetic lube for at least a couple of years with great results, I’ve had 5,000+ miles on a chain with no measurable wear but it does attract a lot of dirt of course. I’ll be using the strip chip to set up a couple of new chains, that literally takes the most tedious process, and what is probably the biggest deterrent for most people, out of the equation. Looking forward to running these on my bike from now on.
Great. Glad the review encouraged you to make the switch. It’s really quite easy once you get started. Cheers
Forgot to mention that I also find Josh from Silca a bit annoying, glad I’m not alone there.