HOW TO RIDE FASTER ON YOUR BIKE: 10 BETTER WAYS – TRAINING AND TECHNIQUE
No matter how fast I go on my bike, I want to ride faster. Don’t you? While recreational cyclists are often happy just to get out and enjoy the fresh air, exercise and scenery, almost every road cycling enthusiast I know is always trying to go faster on their bike.
Whether you are doing a solo training or group ride, riding up a mountain, doing intervals or taking part in a race, club ride or charity event, more often than not it’s about how fast you went, what your average speed was, or how long it took. It’s just the nature of the enthusiast cyclist.
As focused as we are on the goal of going faster, there are a dizzying number of differing road and lab tests, research models, personal experiences, beliefs, and wives’ tales on just how best to make fast happen. They range from practical and essentially free ones, like training more, to others that are quite expensive, like buying aero gear.
With so many tests, views and claims coming at us all the time, one of the things that limit some of us from going faster is the uncertainty of what to focus our training and money on. I don’t know about you, but I hear or read something that sounds good and I’m immediately trying to figure out whether I should do it in addition to or instead of what I’m already doing. I’m also trying to figure out whether it’s a breakthrough or just a bunch bull sh*t.
Train with a power meter, ride with more aerodynamic wheels, lose a few pounds, shave my legs, do interval training…. All sound good but what really matters and what matter most and second-most, etc., and what should I block out for reasons of time, budget, the kind of riding I do, what I can tolerate, etc.? What’s going to make me a better rider to sustain speed improvements over time vs. things that are short-term improvements that will fade or be wiped out by the next new thing?
As a roadie myself, I’ve been trying to sort through this for years. Now that I’m blogging, I’ve been working on the research and drafting of this post for months to try to make some sense of it all.
With the season here, almost here or almost over depending on where you live and ride, I believe I’ve now got a pretty good handle on what makes us faster on a ride, over the course of a season, and from season to season.
Bottom line, there are a lot of things that make us go faster. I’ve organized these into 10 categories and put the categories in the relative order of what can make road cycling enthusiasts go faster and stay faster. There will undoubtedly be some new product technology, training approach, research study, or secret of the peloton that will come along that can perhaps make us faster still. If it is sound, I expect it will fit within one of the categories I’ve laid out and you and I can add it in the appropriate place in our how-to-go-faster toolboxes.
I want to underline that this is directed toward the road cycling enthusiast. It is not about what will make a pro or top amateur road racer faster or a triathlete or cyclocross rider faster or a recreational rider faster. It’s really focused on us committed roadies that ride regularly throughout the year, ride pretty fast already, do a lot of distance, are competitive with ourselves and sometimes with others, and invest serious time and money in this thing that we love doing.
HOW TO RIDE FASTER TOP 10
The 10 ways to ride faster on your road bike are:
1. Get Mentally Fit
2. Train to Ride
3. Practice Riding Techniques
4. Get Your Bike Fit
5. Drop/Hold the Weight
6. Position Yourself Right
7. Get the Right Gear
8. Suit up for Speed
9. Maintain Your Gear
10. Don’t Make Yourself Slower
In Part 1, I cover ways 1 thru 6. These are essentially about better training and better technique and are both the most important and most sustainable ways to get and stay faster.
In Part 2, I cover ways 7 thru 10, most of which are about the gear you can use to enable you to go faster still.
You can read through each of these ways in order or click on any one of them listed above to go directly to the section that describes them. When you are done, you can click the back button in your browser to come back to the list above or scroll up and down to read other ways.
In The Know Cycling supports you by doing hours of independent and comparative evaluations to find and recommend the best road cycling gear and kit to improve your riding experience.
You can support the site and save yourself time and money when you buy through the links in the posts and at Know’s Shop to stores I rank among the best for their low prices and high customer satisfaction, some which pay a commission that helps cover our review and site costs.
Click here to read about who we are, what we do, and why.
1. Get Mentally Fit
Cycling is a tough sport for the average adult enthusiast. Riding long distances at speed on varying terrain and road conditions, 4-6 days a week, month in and out, in the midst of work, family and other commitments is a mental, physical and scheduling challenge, to say the least.
I’m not telling you anything you don’t already know.
What I am telling you is that if you aren’t committed to a few specific riding goals, however ambitious or modest, and you aren’t mentally positive about riding as you push toward those goals, you aren’t going to get faster. More simply, you have to get mentally fit to go faster.
Let me break mental fitness into two pieces – goal focus and a positive mindset. For this section, I will lean heavily on authors who have written for the blog published by Training Peaks, a meeting point for endurance training athletes, coaches, and authors. I have used Training Peaks for years to guide and capture my cycling training but have no commercial relationship with them that is motivating me to refer to them. They just provide what I’ve found to be great, and in this case relevant content.
Regarding goals, you are best off if you set a few specific ones for the season and some intermediate and short term ones to help you get there. For example, my goals this season are to ride 5 centuries, get my solo training speed up to 20 mph for my benchmark 40-mile route, and push my FTP (functional threshold power) up to crack the 3.5 watts per kilo level.
To set up your own goals, check out the piece Adam Hodges wrote on guidelines for effective goal setting and Jim Rutberg wrote on goal setting mistakes to avoid.
Second, you need to lock in a positive mindset surrounding everything you’ll do to get faster. All the effort and time has to be something that makes you happy or that you can train to not make you unhappy. Doing the work to get faster can’t be something that’s a chore, that’s keeping you uncomfortably away from your work or family, or that you’d rather not be doing on certain hard training days.
You have to appreciate the benefit and be positive about suffering if you want to go faster.
Dr. Justin Colson has written extensively on the subject of cycling psychology including a great piece describing 15 reasons why cycling makes us happy. Just the act of riding, getting physically fit, riding with friends, and getting good at something else makes us happy. The research also shows that physical health also reduces stress, anxiety, and depression. So just by cycling, you will improve your mental health.
The question becomes, can you go beyond being happy cycling to being happy working your tail off to get faster? Here again, the research suggests you can if you have the right mindset. You need to focus on getting faster as part of your motivation to master cycling rather than to feed your ego to perform better. This focus will also help you enjoy cycling more.
Mental skills coach Carrie Cheadle talks about getting the balance right between days you train for pain and those when you ride for fun. For the breakthrough training or competitive days when pain and suffering are part of the deal, you need to have some mental tools to help push through. Cheadle has a good webinar where she gives you a context on pain and why you naturally hold back and some tools (starting at around 13:30) to push through the suffering.
Click on the graphic below to go to this YouTube for the webinar.
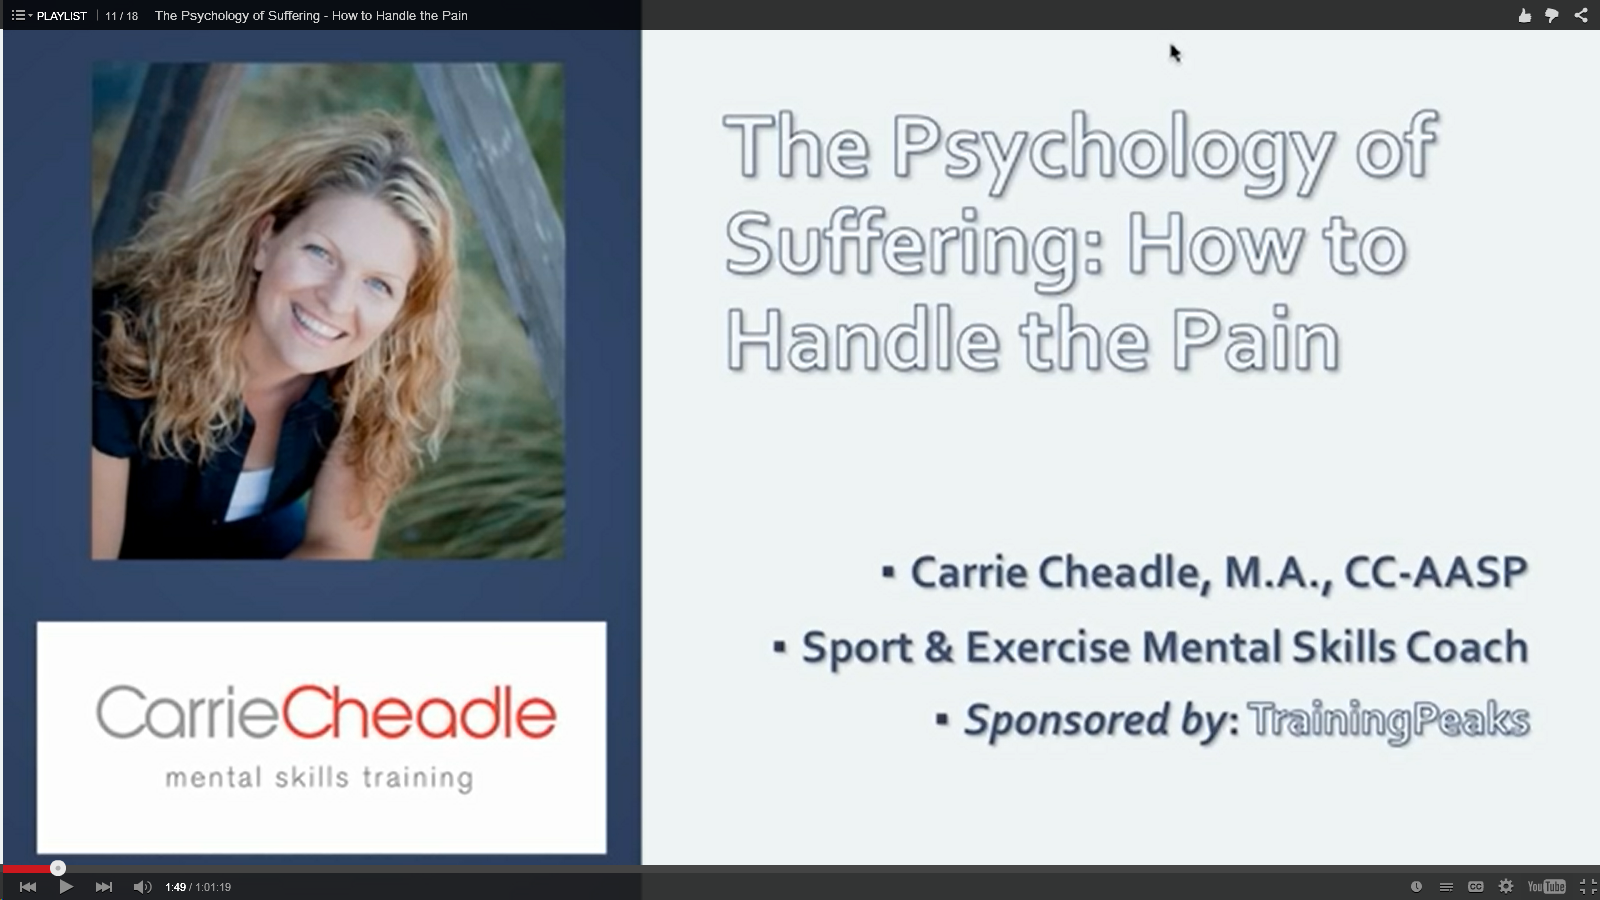
There are more mental training techniques from world-class racers, coaches, and psychologists presented in other webinars here.
Of course, you can take your commitment to go faster, your ability to train with pain, your passion for cycling beyond a healthy level. If it becomes obsessive, you can feel bad if you don’t keep to your training plan, if you don’t achieve your goals, or if you feel conflict around the trade-offs between cycling and other things in your life. If or when this happens, you are getting to a negative mental state, a situation that Coulson writes about here and that you should definitely check out if you think your passion is turning into or being replaced by an obsession.
I can’t quantify the speed increase you’ll get by being mentally fit the way I will from other ways further down this list. Some say that mental fitness – being positive and goal-oriented – is the most important way to improve your performance.
I can say with confidence that until you are mentally fit you will not realize the potential from the other ways that follow on this list to ride faster.
2. Train to Ride
If you are truly a road cycling enthusiast or feel you are on the cusp of becoming one, it’s likely been a few years in the making. I don’t know anyone who wakes up one day and makes or can pull off the commitment to cycling at the enthusiast level. It comes over time.
In the several years of your ‘conversion’ to enthusiast-level cycling, you’ve undoubtedly realized that the better shape you are in the better you’ll ride. Likewise, it’s also probably become clear that getting in shape for cycling requires a cycling-specific training program. I used to play a lot of soccer to get in shape for ski racing – it wasn’t the same. Doing a lot of skiing never got me in shape for cycling, etc.
Many years ago, when my friend Stu thought I was showing signs of taking riding seriously he told me about the bible. He wasn’t proselytizing, though I probably could have benefited from some divine intervention to improve my cycling back then. He was referring instead to the Cyclist’s Training Bible written by Joe Friel, the father of endurance training. If you don’t have a serious cycling training program, and even if you do, that book is the place to go to start or refresh one.
To ride faster on your bike, you need a cycling goal-focused, cycling tailored training program. I talked about goals in the mental fitness section above. Do you want to ride faster over a time-trial length flat course, up a specific type of alpine road, on a Sunday morning 50-mile ride, over a rolling hills group ride, or for a specific race or century or other events you target each season?
One of the reasons I started using Training Peaks years ago was that it provided me one place to define my annual cycling goals, events, and the limiters I need to overcome and upload my training plan to sync with those.
You can upload training plans from apps like Sufferfest and TrainerRoad and packaged training plans you can get from individual coaches or coaching teams like FasCat Coaching or those you can choose from on Training Peaks. Sufferfest and TrainerRoad have scheduling capabilities and TrainerRoad also has metrics to analyze your progress.
Strava and Garmin Connect are also popular trackers of your results. Strava is more about sharing your rides with friends and measuring your ranking against others on segments of the rides you like to do. Garmin Connect is a Garmin-centric Strava imitator that falls short of Strava’s capability and popularity.
For me, Training Peaks works better because it is designed to focus my mind on cycling mastery rather than Strava’s focus on cycling ego, the former being longer-lasting and positive and the later short-lived and potentially negative according to the research cited by Coulson that I wrote about above.
You can also hire a coach for more personal customization, attention, and encouragement. That’s a little pricey for where cycling fits in my family priorities these days but it’s the most personalized way to go if you can afford it.
Whatever route you take to develop a training plan, you should absolutely train with a power meter if you want to ride faster. Let me repeat that and say it more emphatically (and with a link to a post I wrote on the topic): TRAIN WITH A POWER METER. There is no better training tool or piece of gear or kit you can buy to ride faster.
Why is that? Training to improve your power and efficiency (power achieved at a given heart rate) at higher stress and intensity levels will make you faster. You can’t just go out and try to go faster on each ride. That’s not training. If you wanted to run a sprint faster, would you just go out and run the sprint every day trying to go a little faster than the day before? Of course not. It’s the same with cycling.
A power meter measures the output of your engine – your muscles – more effectively than any other tool. A heart rate monitor only measures the output of your heart, which pumps blood to your muscles but doesn’t measure how hard your muscles are working with that blood and everything else that affects your blood. Knowing your power, you can tell your engine how hard to work for intervals, hill repeats, or whatever your training calls for that day – and know how well you are doing against those instructions.
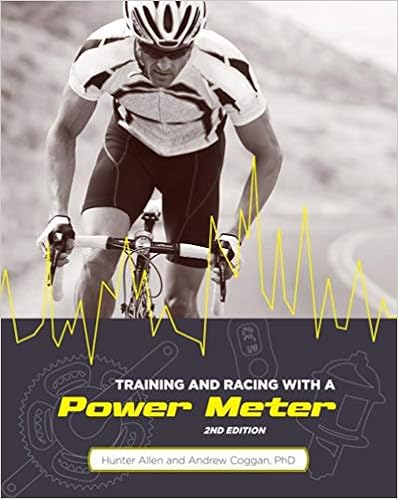
If you are new to power meters or want to see the basics, read this short guide. If you want to read the book on training and racing with a power meter, read the one with that title written by Hunter Allen and Andy Coggan, the High Priest and Father, respectively, of power meter training.
If you are noting my references to religious works and clergy, it’s probably because training can become a somewhat spiritual practice. To do it well and make you faster, you must train devoutly, with religious mental and physical discipline. If you want to ride faster, that is.
You’ll go faster sooner and sustain your improvement more over time by training with a power meter than you will by buying a deep rim wheelset, aero bike, or any other piece of gear I can think of. And with the technology improving and the prices dropping, most road cycling enthusiasts in most cases can get all that they need for training with an accurate, consistent, and dependable power meter for $500/£400/€500/AU$600 give or take a few hundred depending on what you are able to spend and how much data you feel you need. You can read the review and recommendation of the best power meters here to learn more.
Here are two other links that will be useful for training with power. The first is a GCN video that shows you three ways to test for your FTP or functional threshold power, the metric your training is based on.
If the weather doesn’t allow you to get outside to test for your FTP or don’t have a route free of cars and intersections or one that doesn’t have a steady, slightly uphill grade, you can get on your trainer. Most training apps including Sufferfest, TrainerRoad, and Zwift have FTP tests. I find it’s an absolute bear doing an FTP test inside and you will generally produce a lower FTP inside than what you can generate outside. But, if you want to make sure you are continuing to build your power through the winter months, you need to take the test regularly otherwise you are cheating your training.
The point of all of this is that a training program is essential to going faster and training with power is by far the best way to train to improve your speed. You’ve got plenty of tools to build your training program around and keep it going throughout the year.
3. Practice Riding Techniques
As road cycling enthusiasts, most of us have learned our technique on the bike over time. From group riding, climbing, riding long distances, or just navigating in and around the average unpredictable road environment, we’ve learned what works and what doesn’t for each of us.
What you may not know unless you’ve taken the time to figure it out, is what the best techniques are and whether you are practicing them. It may be that you have a pedaling stroke or cadence or gearing approach that works for you but is less efficient, and therefore slower than other techniques that you could learn and adopt.
There are a handful of areas where improved technique will deliver improved speed. Here are the key ones.
Pedaling – If you aren’t putting effort into every part of your pedal rotation, you are leaving money on the table… or perhaps more like watts on the road. Modern pedaling technique breaks up the rotation into four parts, what I think of as 1) down, 2) scrape, 3) lift, and 4) kick. You use different muscles in combination for each stroke to make sure you are getting something out of it. Here’s a quick video explanation from Cycling Secrets.
If you want to practice this in a controlled environment, I’d highly recommend a video co-produced by Sufferfest and CyclingTips called The Elements of Style that includes drills to get into a good riding position and engage your key muscle groups while pedaling the 4 stroke circles. Unfortunately, you now have to be a Sufferfest subscriber to use this video on a regular basis. Here’s a link to other YouTube videos on cycling pedaling technique.
Cadence – Holding a steady cadence, typically between 90 and 95rpm on the flats and rollers and 75 to 80 rpm up steep climbs is key to balancing your power output and energy consumption. Too low a cadence will increase the power output for each crank of the pedals but sap your energy prematurely. Too high a cadence and you get too little power and leave too much energy in the tank while not improving your fitness or strength. Too uneven a cadence wrecks your momentum which results in loss of energy, power, and speed.
While these ranges I’ve listed above are good for most, some of you may prefer a little lower cadence on the flats (85-90rpm) or spin a little faster going up mountains (80 to 85 rpm). That’s fine too.
Learning to maintain your cadence within a range requires being able to select, time, and execute your gear shifting precisely so your cadence doesn’t see-saw in and out of these ranges or very much within them. This takes awareness of what your front rings and rear cogs can do in combination, experimenting with them on the road, anticipating when you’ll need to shift, and good old practice doing all of it.
Purposely riding routes that you aren’t familiar with, doing ones you know have a lot of variation in terrain, and riding sections at higher and lower speeds than you would normally be comfortable with are all good ways to practice your shifting to hold your desired cadence.
Handling – Some riders seem to have an innate ability to handle their bikes. They are quick, agile, and smooth in their movements, know where to be in the turns, and are comfortable bombing down hills and mountain roads. While some of this may come from pure athleticism and experience (both good and bad) on the bike, a lot of this can be learned and practiced by focusing on a few key things.
The most common techniques to improve your handling include braking before you get to corners (rather than inside of them), looking where you want to go beyond the corner (rather than what’s around you), and getting in the drops to lower your center of gravity.
As a former amateur ski racer, one additional technique really connected with me and should with you if you know how to carve rather than skid a ski. When you enter a corner, you want your inside pedal up and your outside one down. By putting most of your weight on the outside pedal, in the same way you do on your outside ski, you’ll have great control of the centrifugal forces to help you control the turn.
There are many other tricks and techniques for cornering. (And getting wider wheels to give you a bigger contact patch helps too.) Here’s another video from Cycling Secrets which lays out some handling tips.
Why does good handling help you go faster? If you can head into corners quicker, take a better line, descend with confidence and… not crash doing any of this, you’ll likely be out ahead of where you would if you take a much more deliberate or cautious approach to handling.
I’m not saying you should be reckless. By practicing and building good handling techniques out on the road, you’ll build the confidence that you know what to do to hit a corner or ride a section the quickest and safest way and will be able to do so faster than someone who doesn’t.
Paceline riding – Riding in a group one cyclist behind another in a paceline can be both exhilarating and scary. Done right, you can go several mph or kph faster from the tremendous drafting benefits you get and the energy you save for when it’s your turn to pull or when you want to accelerate free of the group. (Save that last part for a race, not with your riding buddies or they will quickly disown you.)
Done wrong or with an inexperienced rider in your line, it can be unnerving and potentially unsafe, which in itself can sap a lot of the energy you hope to save to help the group go faster.
Good paceline technique requires that riders pedal smoothly, at a consistent cadence, with about a foot or two between you and that gaps or overlaps are prevented. It also helps if you pull or lead for a period of time shorter than you could, that you fall off toward the center (not the outside) of the road when you are done and the next person in line maintains the pace (rather than speeding up) while you get back in the paceline.
If everyone is able to pull their share, and this isn’t always the case, you can roll back to the end of the line not by coasting but by pedaling a little bit less hard than you were when you were pulling. Otherwise, you run the risk of falling off the back and the line needs to slow down for you to catch up. If someone is not planning to take their pull, they should open up a small gap in front of them and motion to you to move into that spot.
The best way to practice this if you haven’t done it before or if you are making a group with people who haven’t ridden together before is to start off at a slower speed with bigger gaps than normal between riders until you build up the familiarity and confidence of everyone in the group to go faster and ride closer.
Trust is essential in a paceline and if you don’t have it because you or someone else in the group doesn’t demonstrate they know how to do it well, you or that someone else should ask for some coaching or get out before there is an accident.
It’s also good for the paceline or group leader to check on the speed from time to time, either from the front or middle of the line, to see if everyone is comfortable at that speed. It really doesn’t help for the strong riders to burn out the others, especially if they want help from the others to give them a break from time to time.
No matter where you are in the paceline, you should be keeping an eye on what’s going on at the front of the line and beyond. If you are just watching for the rider in front of you, you won’t be able to anticipate changes in pace that typically start at the front. Communicate to the riders behind you what is going on whether it is that you are slowing or coming to a stop or there is something in the road to avoid.
There is any number of written and unwritten rules about riding a paceline depending on who you are riding with and where you are riding. Here’s a good piece from Cycling University whose title, “How to ride a paceline, and not fall down” hooked me in right away and whose straightforward writing kept me there. I made my own attempt at pithy writing with this post called Better Paceline Riding Don’ts and Dos.
There are undoubtedly many other cycling techniques to perfect like braking, climbing, and pacing but the ones above will help make you go faster on your bike. They all take practice and often require changing habits you may have developed over the years.
At a minimum, you should try these techniques and see if it helps you go faster. For a whole season years ago I tried moving my average cadence up from the low 90s to the 100rpm range to do what was working for Lance and what a college coach told me he had his team doing at the time. I felt forever fit but never comfortable in the big ring or moving easily in a paceline where the others were pedaling at 10 to 15rpm slower. So I bagged it.
On the other hand, I continue to practice improving my down/scrape/lift/kick pedaling stroke and find that when I’m doing it right, I can add 10 watts to my power output. That’s big and I’ll likely continue working on it until it comes naturally.
4. Get Your Bike Fit
As you train mentally and physically with better riding techniques, you’ll notice improvement. You also may notice your knees or back or butt hurts. Or, you may plateau. While some of these may be a result of hard training or the need for appropriate rest in your training plan, it may also be that your bike isn’t set-up right.
While you likely bought the right size bike and had some help adjusting the seat when you first bought it, the rest of the bike may not have been fit to your unique anatomy or adjusted as your flexibility or an injury made your initial fit become out of date. You may be riding inefficiently because of your fit alone, beyond what you are doing right with your training or technique.
A good bike fitter will do several assessments before you even get on the bike. They will assess your skeletal structure – whether your feet or knees bow one way or the other, how aligned or curved your spine is, and how balanced your pelvis is. They will also measure your leg, tibia, and femur length and check your flexibility at various points from your neck through to your ankles.
Once you are on your bike, or better on a jig designed for bike fitting, the fitter will measure angles at your hip, knee and angle and your reach to the bars.
From this, you’ll get specific measurements for ideal saddle height/width and fore/aft position, reach to your handlebars, length, and angle of your stem, crank length, cleat position, footbed shims, and pedal spindle length.
All of this costs money, both for the fit assessment and for any components you need to make to make the fit work. After three generations of the Roubaix frame and about 8 years from the first one, I finally got my first real bike fit. I spent $300 on the fit and another $400 or so for a new stem, bars, pedals, and seat. Because of the fit, I also went from 172.5 to 165 cranks on the new groupset I bought and had a shim put in my right shoe.
Bottom Line – The best $700 I could have spent on my bike. Should have done it years ago.
No more hip pain and more comfort in the saddle. Longer, more aero reach made me faster on the road. My power on the trainer went up, though I can’t isolate how much of it was due to a better bike fit vs. being more physically fit from better training. Probably some of each. I can definitely go longer, always a good thing on the bike.
Could I have put that money toward a lighter or more aero wheelset? Sure, but I’m pretty confident that getting my bike fit first made the speed (and enjoyment) gained from a new wheelset all the more than had I not done it.
There are many types of fitters who lean on different combinations of experience and technology to fit you. The better ones use the input from the realms of both art and science. The use of motion capture camera technology and better measurement systems have advanced the science significantly in the last few years to really help the experienced fitters do the job more precisely and less iteratively than in the past.
All of this has made it possible for you to get fit with the same technology and skills pro cyclists use. The video below shows the fit done by Allison Snooks of Landry’s bike shop for Jennifer Wheeler of the Tibco Pro team. I had my initial fit done by Andy, Allison’s colleague at Landry’s, a store manager and LBS the I’ve had my own association with over the last 20 years. We went through the same process shown in this video and I have gone back every few years as I’ve aged or had one injury or another to get it updated. If only all it took was a good fit to ride like Jennifer…
5. Drop/Hold the Weight
Reducing your weight provides obvious benefits to your riding. The lighter you are, the more you can put your energy into propelling your bike forward rather than towing your keister down the road. This is especially true when going uphill and accelerating. Weighing less makes no/little difference when going at a constant speed on the flats and is a relative disadvantage going downhill.
I detailed the cost-benefit of dropping weight from your wheelset, bike, and body for an earlier review and came up with the chart below. You can go through it or just acknowledge what you probably already know – losing weight from your body is the most effective and least costly way to go faster uphill.

There are myriad diets that come in and out of fashion for athletes to lose fat and add muscle. My simple mantra is to train regularly, eat better, and eat at the right times. While I often think that training gives me the right to eat whatever and as much as I want, I know that really isn’t the best thing to do if I want to ride faster that is. Riding faster requires generating more power per kilo and generating more power per kilo requires building more muscle. Eating better and at the right times can help you do that.
Eating better is all about the right combination of protein, carbohydrates, fruits, and vegetables. Lots of fruits and vegetables. You’ve probably heard plenty about all this so I won’t pile on. Lay off the ice cream and soda; easy on the brewski. Hydrate so you pee 4 or 5 times a day. Think about feeding your muscles rather than your appetite.
Eating at the right times is equally important. What you do in the 30 minutes following a workout is crucial to muscle growth and future speed. If you’ve done a hard workout, you’ve broken down muscle fiber. Protein and carbohydrates together will feed and repair the muscle so it grows, you get stronger and you go faster.
There is a lot of different advice about how to eat right, what amount of protein, carbs, etc. to eat, and when to eat. I wish I could direct you (and me) to the right answer on all of these things. Unfortunately, I can’t.
The nutrition forum on TrainerRoad and articles on Training Peaks provide a lot of perspectives. My personal favorite is the Winning In The Kitchen podcast that FasCat Coaching did on the whole topic. It’s entertaining, easy to remember, and has become my go-to approach for dropping and maintain weight.
6. Position Yourself Right
One of the best (and cheapest) ways to ride faster on your bike is to position yourself right both when you are in a group and when you are riding out front of it or on your own.
Specialized Bicycles did a series of YouTube videos in their own wind tunnel to determine the time savings of using various riding techniques, equipment alternatives, and other ways cyclists can ride faster. They did several on the topic of positioning which I’ll refer to here.
As you can see in the video below, drafting in a paceline can reduce your drag as much as 50% and saves you about 5-6 miles/hour worth of energy.
Personally, this seems about 2x more than what I have experienced in my own paceline riding, but the point is well taken. Ride together and you will ride much faster and with less energy expended than any other riding technique I’m aware of.
Of course, you’ve got to be fit and have the technique to ride in a paceline in the first place. And, the more fit and better your technique, the faster the paceline you can hang with. If you are riding on your own or with a couple of friends in a century or sportive event, it’s always fun to join in a larger paceline and feel the kick of riding faster with less effort and more camaraderie. But, it sucks when after a few miles you realize you aren’t in shape to hang with them and you have to pull out and search for another group that you can stay with.
When you ride on your own without the benefit of a paceline, the position of your body in the wind is crucial to how aerodynamic and fast you ride. I’ve always heard that spending about 75% of the time in the hoods and 25% in the drops is typical for the road cycling enthusiast.
If you race or want to ride faster, you have a strong core and flexible body and have more of a race bike with a longer top tube than an endurance bike with a shorter one, you’ll probably be spending more like 40 to 50% of your time in the drops.
A study led by Professor Nathan Barry and contributed to by four other researchers (click the link for the abstract, go to the pdf shown there for the full study) published in 2015 in the Journal of Sports Engineering and Technology provides a detailed analysis of how much drag you can reduce if you bend your arms and torso in addition to where you put your hands.
First, Barry surveyed 7 published studies that showed “the drops posture reduces drag by up to 12% compared with the hoods posture.”
But, by running wind tunnel tests of 5 different road cycling postures with your hands in the hoods and drops positions, he showed how to increase the drag reduction further. Look at the photos and table below pulled from the photo and data in his article.
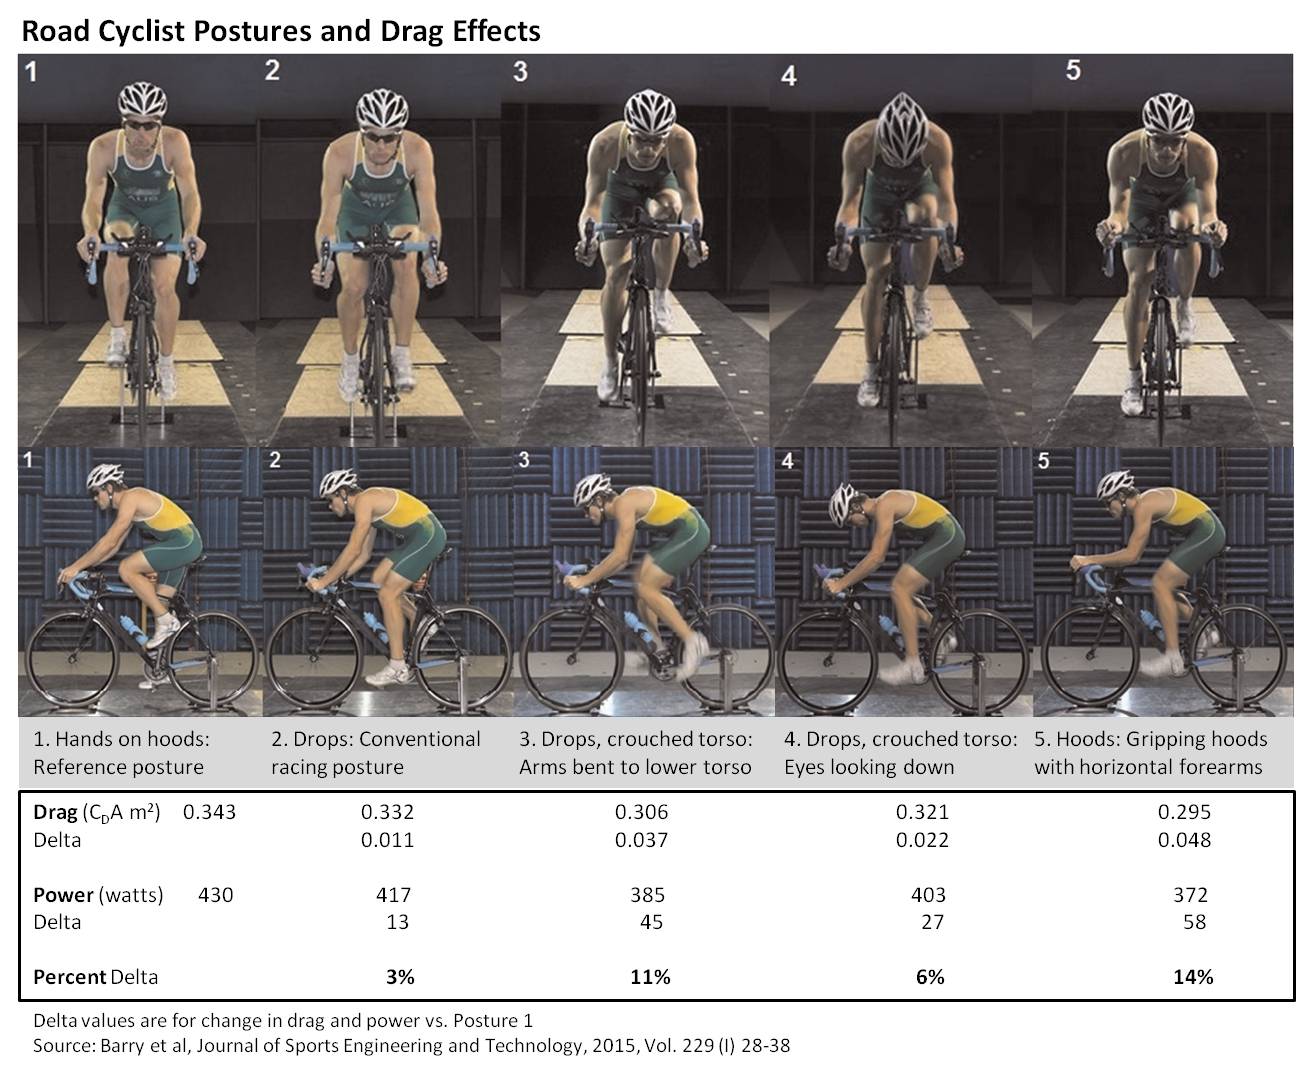
Going from the hoods to the drops (Posture 1 to Posture 2) without changing or bending your arms or torso gains you little – 3% reduction in drag and power required or 13 watts at 45kph/28mph. This would save you 10 seconds over 40K/25m if you had your hands in the drops 25% of the time. Not bad but not enough for me to change anything.
Interestingly though, if you stay in the hoods and bend your forearms so they are horizontal (Posture 5), you reduce your drag and power requirement by a whopping 14% or 58 watts from having your hands in the hoods with unbent arms. Looking more closely at some of the still photos of racers on the pro circuit, I see this position a lot. I’ve tried it on my trainer and on the road and find it is one I can hold as long as my core is strong. (I’m adding some crunches to my training.)
Instead of thinking about spending 25% of your time in the drops as does the typical enthusiast rider, try spending 50% of your time in a combination of hoods and drops with your arms and your torso bent. This is Posture 5 in the hoods or Posture 3 in the drops. Combine with the other 50% of the time in the hoods with your arms straight, torso up, and stomach muscles relaxed, your overall drag will be cut roughly 6-7%, your power saved will be 25 watts, you’ll cut 90 seconds over a 40K/25 mile course and you’ll be riding about 0.5 mph or 0.8 kph faster.
Zoom Zoom. I’m up for that.
Check out Part 2 of How To Ride Faster On Your Bike: 10 Better Ways that focuses on the gear and kit we enthusiasts use to get extra speed.
Find what you're looking for at In The Know Cycling's Know's Shop
- Compare prices on in-stock cycling gear at 15 of my top-ranked stores
- Choose from over 75,000 bikes, wheels, components, clothing, electronics, and other kit
- Save money and time while supporting the site when you buy at a store after clicking on a link
* * * * *
Thank you for reading. Please let me know what you think of anything I’ve written or ask any questions you might have in the comment section below.
If you’ve benefited from reading this review and want to keep new ones coming, buy your gear and kit after clicking the store links in this review and others across the site. When you do, we may earn an affiliate commission that will help me cover the expenses to create and publish more ad-free, subscription-free, and reader-supported reviews that are independent, comprehensive, and comparative.
If you prefer to buy at other stores, you can still support the site by contributing here or by buying anything through these links to eBay and Amazon.
You can use the popup form or the one at the bottom of the sidebar to get notified when new posts come out. To see what gear and kit we’re testing or have just reviewed, follow us by clicking the icons below.
Thanks, and enjoy your rides safely! Cheers, Steve
The reason why the advantage of drafting, as reported by Specialized, seems to you like “2x more than what you’ve experienced” is because what you feel on the bike is not the 2x reduction in drag, but rather the roughly 25% reduction in required power output required, which is a different thing. Drag, although it is the most significant component in the overall resistance you experience when riding on flat terrain, is still only a component, and not all of the resistance. At the speeds you likely ride at (let’s say 40 kph for a paceline of reasonably fit amateurs), a 50% reduction in drag should correspond to a power saving in the vicinity of 25% or so, which is probably what you feel.
Claude. Thanks for that explanation. Makes good sense. And special thanks for putting me in the class of reasonably fit amateurs riding at 40 kph. I’ll take it! Steve
No prob. Just re-read my response (which I should have re-read before actually posting it…) and that’s a lot of “required” in there in a single sentence! LOL Glad the point made it across nonetheless.
Three years later and this is still the best explanation I’ve seen of this drag vs power while drafting confusion. Actually, Steve, this is still one of the best (concise, understandable, on point) article out there. I forward it to newbies several times a year.
Thanks Ron. Glad it still holds up and thanks for sharing it around. Steve
Hi Steve, many thanks for the very detailed and awesome reviews. I am a rider from India, where cycling as a sport is still limited. As a result, a bike fit is not possible. I was curious if you can explain how lowering the stem helps in aero advantage vs what people claim to be increased discomfort? Also, I am riding the Shimano RS 11 currently with Schwalbe Lugano 25mm. I am thinking of upgrading to Continental Grand Prix 4000sII 25mm. However, not sure if that will be a good idea with the RS11 wheels. I have a CAAD10 if that is also important to consider from clearance point of view. Thanks Rahul!
Welcome Rahul, Lowering the stem will lower you torso but done alone might mess up other aspects of your fit and make you less comfortable on the bike (hips, shoulders, knees). It’s not worth it if your fit is pain free now. You can lower your torso for a better aero position without changing your fit, obviously by just bending it more. As to the tires, I write about this at the end of section #7 in the Ride Faster series here. That’s the best tire to get but I’d stay with the 23mm size. The 4000s II has better rolling resistance than most others and probably by 20 watts or more over the entry level Lugano. I wouldn’t go to the 25c version though. It actually measures close to 27mm mounted and inflated on the wheels and your RS11 probably has a 20mm outer width. You save only a watt or two less rolling resistance going to the 25c from the 23c tire (which actually measures about 24.5mm inflated) and you lose aero benefit with that big a differential between the rim and tire widths of the 25c. But that’s the right tire. Best prices are at ProBikeKit, Merlin, Wiggle. If you want more comfort, which is what everyone seems to be seeking with the wider tire, just lower the air pressure by 5psi as long it isn’t below 90-95psi already. Best, Steve
Many thanks for the reply. It really helps me a lot. Actually my bike is new. Done only about 1000kms so far. The initial few kms I had back pains after a few kms. Surprisingly, my back pain went away once I took the saddle back and raised it slightly at the same time. I now sit more longer on the bike but feel more comfortable. My speeds jumped as well. But if I ride over rough roads (which there are many in India) my hands start going numb and tingly after about 40kms. So I was wondering what I could do to solve that. Some articles I read say by sitting long and low might help but others mention the opposite. I am also considering a more cushy bar tape might help. The stock bar tape is a little thin. I am 95kgs and maybe the problem could be a weak core but I will take all the benefit which a better fitting bike can give! What in your opinion can cause this tingling sensation in the hands? Again, really appreciate you taking out the time for your response!
Rahul, I’m getting in a little beyond my depth when it comes to fitting. From what I’ve learned getting my own bike fit, it could be a lot of things that lead to what is probably you reaching too far for the bars. Are you elbows comfortably bent or are they stretched out straight? If so, you could try moving the seat a little forward. But that could mess with your hip angle to the pedals and you might need a longer stem to keep you in the right position between your hips and pedals. I’d go back to the store you got the bike from or another one and have some one look at you. It may be something obvious that doesn’t require a full professional fit, at least to ease the pain. Steve
Ok thanks for the advice Steve!
Amazing! I’ve just read this and the graphic of riding positions is a revelation….I am typically 50/50 position 1&5 by default, I just find them more ‘comfy’. Little did I know that I’m ‘drag efficient’ just through feeling comfortable on the bike.
Anyway, another HUGE thumbs up Steve, the more I read, the more I can’t turn off this bloody iPad! Everyday is a school day 🙂
Quick question… how much time on a typical ride or gran fondo would you spend in the drops as a result of your bike fit and training?
is there a guide as to how long we ‘should’ be spending for these sorts of rides ? people say 90% on the hoods and 10% on the drops. does being more in the drops say 50/50 suggest your stem is too high anyway and perhaps worth trying a lower stem??
Miles, The research I presented above suggests it’s not so cut and dried as being in the hoods or drops. Actually, it suggests, and what I’ve experienced myself since reading this research is that being in the right hood position, with the arms bent 90 degrees at the elbows is more aero than being in the drops. Other hood positions are less aero than being in the drops. I think the percentage of time in the most aero postion vs. lesser ones is dependent on the kind of ride you are doing. If you are pacelining on a group ride for example, there’s not a whole lot of benefit being in the ideal aero position unless you are pulling. If you are riding solo and trying to go as fast as you can, be there as much as you can. If you are climbing or just out for a jaunt, no benefit for being aero. Etc. I see fit as a totally different deal. Get the fit right. Period. If you are flexible and on a race bike, you’ll probably have your “stack” lower than if you are more of an endurance rider. Stem height, angle, bar and seat position, etc. will all come out of that. In jazz terms, get the right cats in the band (fit, bike) for the kind of music you want to make (race, group ride, etc.) and let them innovate for the kind of music (ride) you/they want to create. That’s what your namesake did to come up with such a different sound with his Kind of Blue vs. Bitches Brew albums. Steve
Sorry just read this – I didn’t realise you have to subscribe to all the articles separately for an update on comments etc.
Thanks so much for the response… I know I said ‘quick’ but you did it justice as usual!! You’re clearly a connoisseur with regards to Jazz. It’s not cycling related but do you play per chance?! You’re the first person I’ve met besides my dad that seems like you can actually hold a full evenings conversations worth on MD let alone Jazz!!
Used to play the tenor.
Hey Steve, have just been re-reading this article in preparation for my next years’ cycling goals and noted your comments about strava. I think they have introduced a training component that seems to follow the training bible now.
The mental fitness article (and the video) is pretty awesome i have to say. I’m doing half marathon and going for a PB of under 1:30 if possible so learning to take the pain and relax will come in very handy!
Thanks Miles, Chapeau on the advance planning and thanks for the heads up on Strava. Steve
I’ve used the Strava CTS training plans for about a year, on and off. Strava has no planning tools like on TrainingPeaks, you are either on a specific CTS plan or not, and its not possible to create your own plan on Strava.
The Strava/CTS training plans work fine but are isolated from the rest of Strava. You sign up for a plan, then receive daily emails about tomorrow’s workout. You can view upcoming workouts in the Training > Training Plans menu, however *future* workouts aren’t integrated into the Training Log or Training Calendar. There are no analytics to help plan future workouts for tapering before a big event.
My workouts are managed and monitored on TrainingPeaks, and I primarily use Strava for monitoring performance improvements on public and private segments that I’ve setup up. And Strava is just plain fun if you are in a club and ride with others, especially the FlyBy feature.
The upcoming StagesLink looks interesting, and was built on top Today’s Plan which has become a competitor of TrainingPeaks.
Thanks – is the STagesLink part of strava or is it to do with the stages powermeter ??
Thanks Steve… haha! since the arrival of our now 15months i have to plan my training a lot more surgically. I also do a fair bit of running so i guess i need the schedules to tie in to accommodate them both.
I’m currently looking at taking up the ‘cycling-inform’ training plan . will see how that goes and feed back.
Good afternoon Steve,
Now that I have a power meter (thanks for your guidance!), it is time to try to make sense of it all. With the 4iiii and Edge 820 there is an algorithm to calculate FTP – apparently essential for determining training power levels. After a few hundred miles of various indoor riding, the Edge automatically calculated my FTP at 160 watts (embarrassing, but I am an “old” newb, with much room for improvement). I then decided to do an FTP test to confirm by riding at 160 watts for 30 minutes, recording the whole time for FTP and the last 20 minutes for LTHR. After a good warm up, rode steady the entire ride at 160 watts (indoor trainer), but only was able to finish without slowing down through maximum effort (as it should be?). Might have needed help getting off my bike if it wasn’t on a trainer. 🙂 So, I would say a full effort. Since FTP is supposed to be approximately .95 times average power for this 30 minute ride, then my FTP would actually be 152 watts (maybe less based on the will power required to finish).
My real question is my LTHR. I believe that my max HR is 175 bpm (fairly high for 64 years old man) based on the testing I have done. Average HR for the last 20 minutes of the ride was 168 bpm, with 172 average the last 8 minutes. Actually reached max HR a couple of times in the last 4 minutes. If accurate, my LTHR is 96% (168/175), leaving almost no margin above LTHR. Have spent some hours researching on the web, and it appears that LTHR should be approximately 85% max HR.
Have I done something wrong here? I understand if you don’t want to weigh in on this one… seems to be a bit of a hot potato.
Take care and pleasant riding!
Wheldon,
First, big congrats for going through the process. A lot of people never do it. Can I get away with saying well done Wheldon?
Second, forget about LTHR. It’s a substitute for FTP for people who don’t have a power meter. You’ve got one so base your training on FTP.
A couple of other thoughts. I’m not high on the Edge calculated FTP. Next time you do a FTP test, just do it with a proper warm-up and then as hard as you can for 20 mins. If you held 160 for 30 mins, you probably could have gone harder for 20 mins. Also, if you were able to ride your within a couple beats of your max HR for 8 mins (and live to write me about it), it’s probably not your max HR. While that 175 number sounds about right for someone your age, everyone is different.
But again, forget about using HR for training if you can use power.
Cheers,
Steve
Thanks Steve! It’s training with power for me from now on… 🙂
Steve – this may be the best article you have written – thanks!
Great article although old now, only started cycling about 1 year ago and I instantly made massive gains from 173 FTP to around 280 (3.7w/kg)… but have stalled… so I got the bike fit and have lost about 10% power, it’s been 3 weeks since the fit from a very reputable guy. Any advice appreciated as to whether I give up on the fit or stay with it?
Marcus, Could be your fit, training or FTP testing. That amount of gain in 1 year is unusually good. If you feel better/more comfortable/more able to do what you want and do for longer on the bike after the fit, I’d suggest you continue with your training program and do your FTP testing every 6 weeks or so in a consistent way to see what the results show. Steve
Amazing piece of work here, Steve. Thank you very much. I am just a new rider and I found this site so much helpful. Love to buy you lunch sometimes. Great work.
Antoine, Thanks for the feedback. Glad you found the site. As for lunch, with all that’s going on now, guess it will have to be take-out for the foreseeable future. 🙂 Steve
I am so impressed by the efforts in this information you are putting out. I must have read 2 hours about finding the right wheelset for my new gravel bike from your pages. You answered questions that I didn’t even know applied. I will be going regional instead of branded. Thank you!